In our humble(?) opinion, the most critical part of any survival or in-case-of-emergency kit takes no bullets, starts no fires, and cannot call for help. Without WATER, all the guns, matches, lighters and communication gear becomes useless junk in a matter of days.
A quick glance at news coverage of any area struck by a natural or man-made disasters will quickly show you that when sh*t hits the fan, municipal water services become intermittent or non-existent. Plus, even when tap water does still flow, can you trust it not to have seen contamination at some point in its journey through miles of pipes potentially corrupted by whatever natural (or man-made) disaster occurred?
Oh, and for those of you thinking, "I have a private water well so I'll be just fine," we suggest you think, again. If flood waters have reached your well head, then contaminants quite likely have infiltrated your well.
Water, water everywhere... but not a box to drink?
First of all, whenever possible, keep a stockpile of potable (drinkable) water in the house -- enough to support all members of your household for at least three days. When figuring out how much water you may need, remember that in addition to the water each person will need to drink each day, you will also require clean water for cooking, washing, and basic hygiene needs.
Store the water in clean containers in a place least likely to see flood waters or get impacted by bad weather. We also suggest keeping a few clean metal pots and pans in a waterproof storage container with your emergency water supply so you have something to put the water in for cooking, cleaning, washing utensils/cups, etc.
Next, stay tuned to the radio. Often times the Red Cross, fire departments, local government agencies, the National Guard, or other groups set up relief and water distribution stations in areas where disasters have cut off access to safe drinking water.
As a friendly reminder, please do NOT try to make it to a relief site during the height of a disaster or using impassable roadways. Wait until the weather clears and conditions improve, if you can. Emergency crews have the equipment needed to make it to you, eventually, so if travel seems too precarious, try to wait for help.
OK, so the water still flows from the tap or a private well...
Short of having sophisticated purification systems on-hand, boiling water serves as one of the best ways to kill harmful organisms (i.e. bacteria, parasites, microscopic critters, etc.). The water flowing from a tap/faucet or a well may contain any number of potentially hazardous contaminants in the event of an emergency and should, at the very least, get boiled for safety before consumed.
Granted boiling does make specific contaminant concentrations rise in water -- examples: dissolved metals like iron, copper, mercury, lead, arsenic etc. -- but not boiling the water pretty much invites immediate, life threatening conditions (like uncontrollable diarrhea, dysentery, etc.) to the party.
Field method #1 for 'purifying' water during an emergency (filtering & boiling)
Make certain you use clean containers for this. Remember we said to keep a few of those in a waterproof storage box earlier?
1) If working with potentially 'dirty' or cloudy water, use whatever means you can to strain the water so that as much dirt, dust, debris, sediment, and other visible gunk out of the water. Clean cloths, coffee filters and improvised paper towel filters work well for this purpose.
2) Boil the water vigorously for at least one minute after filtering.
3) Let the water cool before use.
Note: Recently boiled water will become a breeding ground for bacteria if you let it sit too long before use, so use immediately and re-boil for use at a later time.
Field method #2 for 'purifying' water during an emergency (filtering & chlorination)
In some cases starting a fire or locating an alternate heat source simply will not happen. In cases like that, follow step '1' from the above procedure and then disinfect the collected water using unscented liquid chlorine (bleach).
Important: Read the label on the bleach bottle to determine the percentage of chlorine it contains. Not all bleaches available in stores contain the same concentrations of chlorine! Should the label have come off or otherwise become unreadable, you can always try what we call the "Add & Wait" method.
1) Add a small amount of the unscented bleach to the collected water and shake or stir vigorously. In this step you want a complete mixing of the water and bleach to occur.
2) Allow the mixture to stand undisturbed for around 30 minutes.
3) Once 30 minutes has passed, if the collected and bleached water gives off a slight chlorine smell, it should be safe to consume. If, however, after 30 minutes no chlorine smell exists in the water, repeat the treatment process and check the water every 15 - 20 minutes for a slight chlorine scent. Again, if after the waiting period you pick up a slight chlorine smell, the water should be safe to consume.
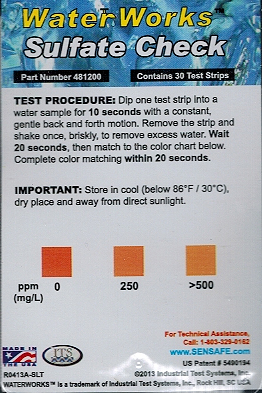
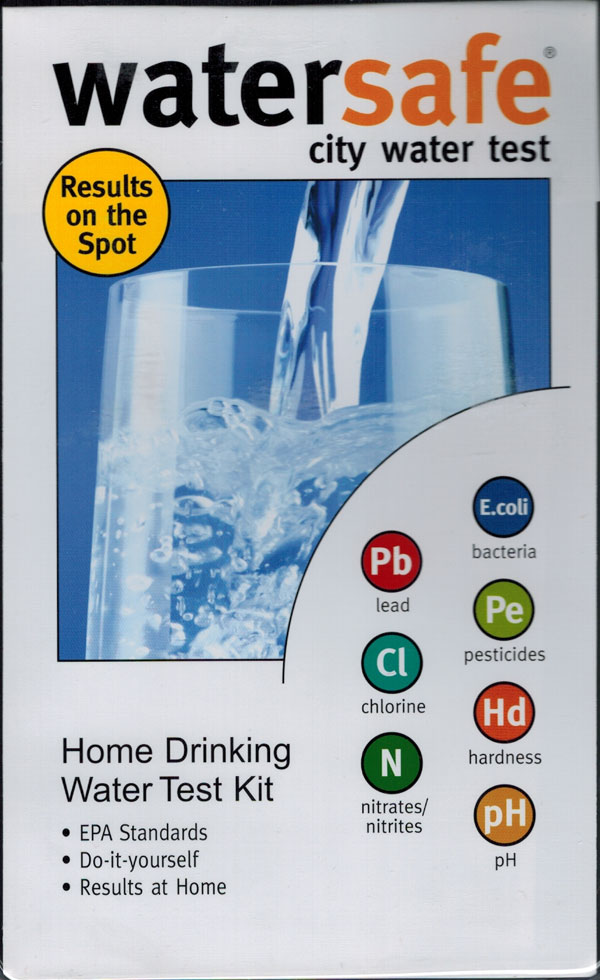
Good water test kits for survival kits?
Often overlooked as important survival tools, water test kits and water testing products do not get added to people's survival or emergency preparedness kits -- and that's a BIG mistake.
We suggest considering at LEAST the following water testing products for YOUR survival bag or kit:
Moral of the story?
In addition to the waterproof matches, non-perishable foods, thermal blankets, light sources, extra batteries, medical supplies, radios, and backup generators etc. ... please don't forget to include safe, clean drinking water and tools to help make water potable in your survival kits!